The island's bridges change character twice a day, and only one of those changes is worth setting an alarm for. In the last hour before sunset, stone turns honey-coloured, iron railings throw long shadows across the deck, and the water beneath goes briefly still enough to double everything above it. Twenty minutes after the sun drops, the light goes blue and the lamps come on. What follows is about working that window properly: choosing the bridge, standing in the right place, keeping the camera steady, and getting a clean frame when half the island seems to have had the same idea.
Start With the Light, Not the Bridge
Walk your shortlist the afternoon before you plan to shoot, at roughly the hour you intend to return. It costs an hour and saves an evening. What you are looking for is simple: which face of the bridge is in sun, which is in shadow, and where the sun actually sits relative to the span when it drops.
A bridge running roughly east to west catches the light along its length at sunset. The deck glows, the parapets pick up a warm edge, and the whole structure reads as a line leading somewhere. A bridge running north to south gets raking side light instead, which pulls texture out of old masonry and makes arches read as solid shapes rather than flat curves. Neither is better. They just want different compositions, and knowing which one you have keeps you from wasting the good ten minutes walking back and forth.
Arrive forty minutes before sunset, not five. The light improves steadily from that point, and the final minutes before the sun touches the horizon are often the harshest and least interesting of the whole evening. Stay through the afterglow, too. Many photographers pack up the moment the sun disappears, which is precisely when the sky starts doing the thing they came for.
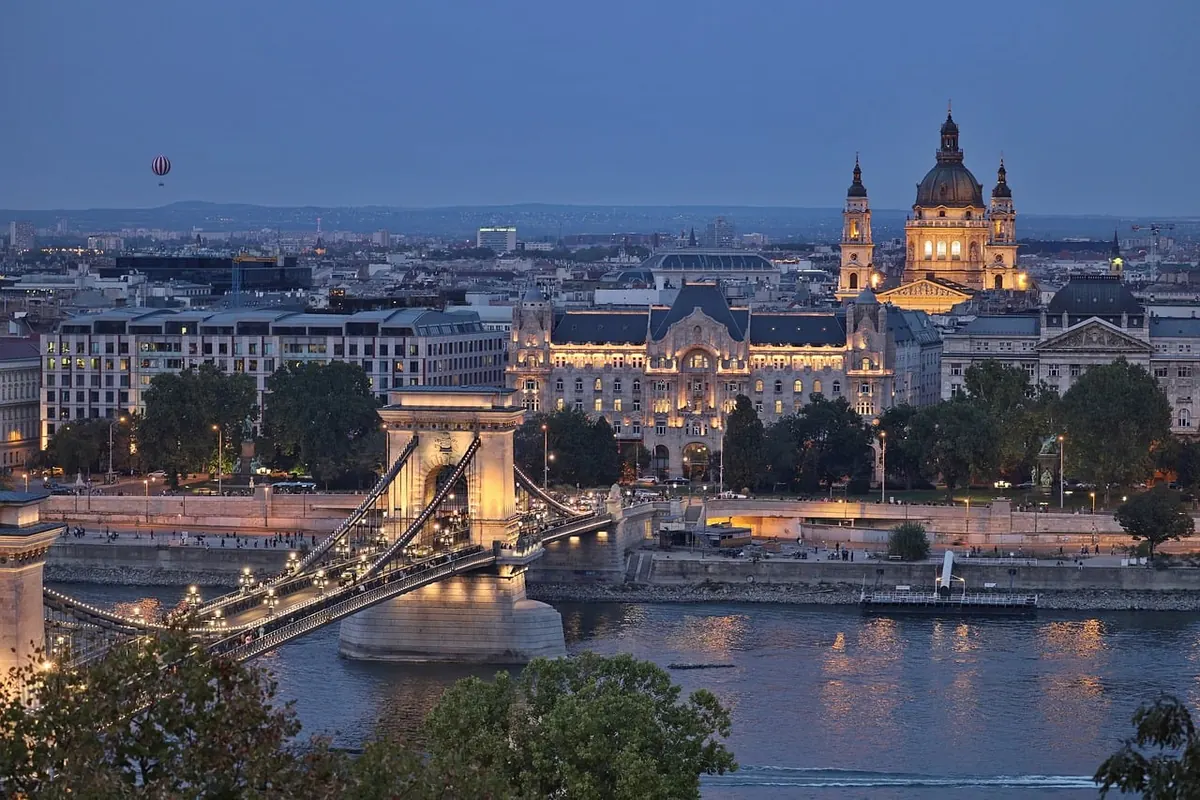
Treat the evening as two separate shoots. The warm window runs from roughly forty minutes before sunset to ten minutes after, and it is bright enough to hand-hold. The blue window runs for about half an hour after that, when the sky and the water go the same soft colour and the lamps come on. It needs a tripod and exposures of a second or more, and it is usually the quieter of the two.
Angles That Earn Their Place
Most bridge photographs fail because the photographer stands in the obvious spot and takes the obvious picture. These four positions will cover almost any span on the island:
- Three-quarter view. Step off the axis of the bridge and shoot across it at an angle. You get the length of the span, the side of the arch and a slice of the far bank all at once.
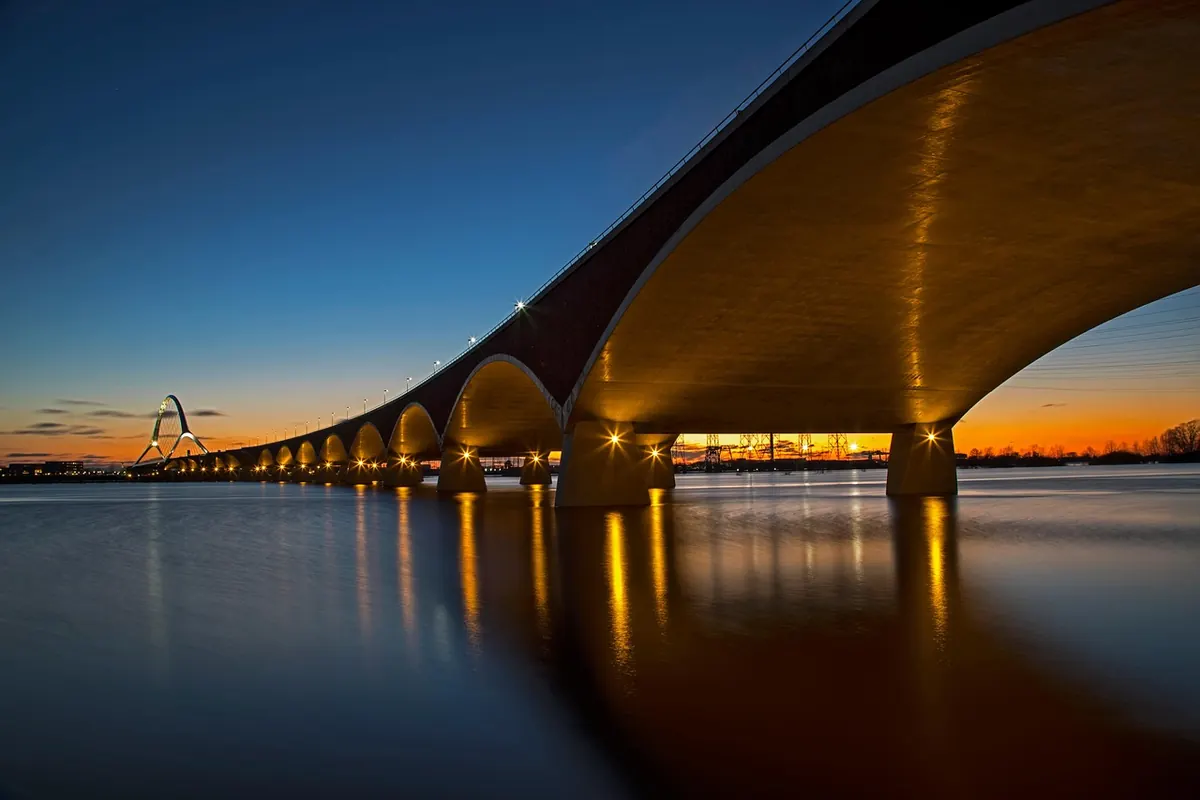
- Low and close. Kneel at the water's edge, or as close as the bank allows. Getting the camera down near the surface makes the bridge loom and gives you a reflection to work with.
- Under the arch. Frame the far bank through the opening. The arch becomes a frame within a frame, and the shaded stone gives you a dark border that pushes the eye outward.
- Compression from a distance. A longer lens from the far quay stacks the bridge against the buildings behind it and makes the whole scene feel denser than it does to the eye.
Pick one of these and work it properly rather than rushing between all four. Ten minutes in a single position, adjusting height and focal length, will teach you more about a bridge than an hour of walking.
Reflections: Your Second Subject
Water is the reason island bridges photograph better than inland ones. Get the camera low and the reflection becomes as prominent as the structure itself; stand up straight and it mostly disappears. That single change of height alters the picture more than any lens you could buy.
Wind is the enemy. A rippled surface breaks the reflection into fragments, which can look wonderful as texture but will not give you a mirror. Watch the water for a minute before you commit. Gusts come in cycles, and there is nearly always a lull long enough for a two-second exposure.
A polarising filter is tempting here, and it does cut glare and deepen the sky. Use it with restraint. On a wide lens pointed at a blue sky it can darken one corner far more than the rest, and it will also thin out the reflection you were trying to capture. Rotate it slowly while watching the surface, not the sky.
If the water will not settle, lean into it. A one- to four-second exposure smears the ripples into a soft wash while the bridge itself stays sharp, and the result often looks calmer than the scene felt.
Tripod Discipline and Settings That Hold
A tripod is not optional for the blue hour, and it is genuinely useful earlier than most people admit. Set it up properly: legs spread, centre column down, and something heavy hung from the hook if there is any breeze coming off the water. Sand and uneven stone are why the spikes exist.
Turn off image stabilisation when the camera is on a tripod. Most lenses still prefer it, and the sharpest frame of your evening is the one you ruined by leaving it on.
Then work through the basics in order. Set the base ISO. Close down to around f/8 or f/11 on a full-frame camera, or f/5.6 to f/8 on a smaller sensor, which is where most lenses are sharpest and the depth of field covers both the near parapet and the far bank. Focus about a third of the way into the scene rather than on the horizon. Trigger the shutter with a two-second timer or a remote release, because pressing the button by hand on a tripod is still enough to blur a one-second exposure.
Check the histogram after the first frame and protect the highlights. A sunset sky that looks glorious on the back screen is often clipped beyond recovery. Bracket a stop either way if you are unsure; it costs nothing and gives you options later. Keep the lens hood on to control flare, and wipe the front element between shots. Salt air leaves a film you will not see until you are home.
Getting a Clean Frame When Everyone Arrives
Golden hour is the busiest hour on any island. Plan around it rather than resenting it. The dependable trick is to shoot the warm light as it comes and stay for the blue hour, because the crowd thins quickly once the sun is gone and people head for dinner. Twenty minutes after sunset you will often have the deck to yourself.
Position matters as much as timing. Walk to the end of the bridge rather than the middle, stand tight against the railing so the tripod occupies a corner rather than the path, and let people pass. If someone stops in your frame, wait. They nearly always move within a minute, and asking politely works better than sighing audibly.
When the wait is hopeless, use the crowd. A row of silhouettes along the parapet, backlit and small, gives the bridge scale and a sense of occasion. It is a different photograph from the empty one you planned, but it is often a better record of the evening.
A Shot List for One Evening
Working to a sequence keeps you from drifting and gives you something coherent to edit. Forty minutes before sunset, start here:
- Wide establishing shot from the bank, bridge running across the frame, sky included.
- Three-quarter view from the parapet, framing the span and the far shore.
- Low water-level shot with the reflection filling the lower half.
- Detail: railing, hinges, worn stone steps in raking light.
- Through the arch, far bank framed by shadow.
- Long-lens compression from a distance, stacking bridge against buildings.
- Blue-hour frame, lamps on, exposed for a second or longer.
Shoot in that order and you end with a set that shows the bridge rather than one lucky picture of it.
Before You Leave the House
Charge both batteries and clear the card. Pack a cloth for sea spray, a small torch for reading settings in the dark, and a light jacket, because the temperature drops fast once the sun is down. Tell someone roughly where you are going if you plan to be on a rocky bank after dark, and keep an eye on the tide if the island has one, since a low ledge that makes a superb reflection shot at seven can be underwater by nine. Arrive early, stay late, move your feet before you touch the zoom, and let the light do the rest.
Photo: LeoVullings / Pixabay